If you have always wanted to know how to hammer a classic Urzel bell for the traditional Urzelnlaufen out of sheet metal, you have come to the right place.
Here in Cincu, when the Lole parade through the lanes during the Fuga Lolelor, the unmistakable sound of the bells is the heart of the custom.
I will show you how to make such a bell yourself. It really is no rocket science; you need a bit of strength in your arms and a welder.
Here is my plan for putting together a bell like this yourself.
What materials you need
- Sheet steel: Ideally 1.5 mm DC01 cold-rolled sheet (it can still be bent and shaped by hand quite easily).
- Flat bar: An offcut (approx. 20 x 3 mm) or a piece of round bar for the handle on top.
- Clapper: A forged nail, a large nut or a piece of thick round bar on a wire.
- Tools: Angle grinder or tin snips, hammer, vice and a welder.
Cutting the blank (the “butterfly shape”)
We make full use of the format: an A4 sheet measures 297 x 210 mm. If we leave a 5 mm margin all round for the printer, a drawing area of 287 x 200 mm remains. The finished bell will end up a respectable 13 cm tall. So you can comfortably draw your template at your desk, cut it out and then simply transfer it to the sheet metal.
Laid flat, the whole thing looks like a double trapezoid or a rough butterfly.
I have prepared an A4 drawing that you can simply download:
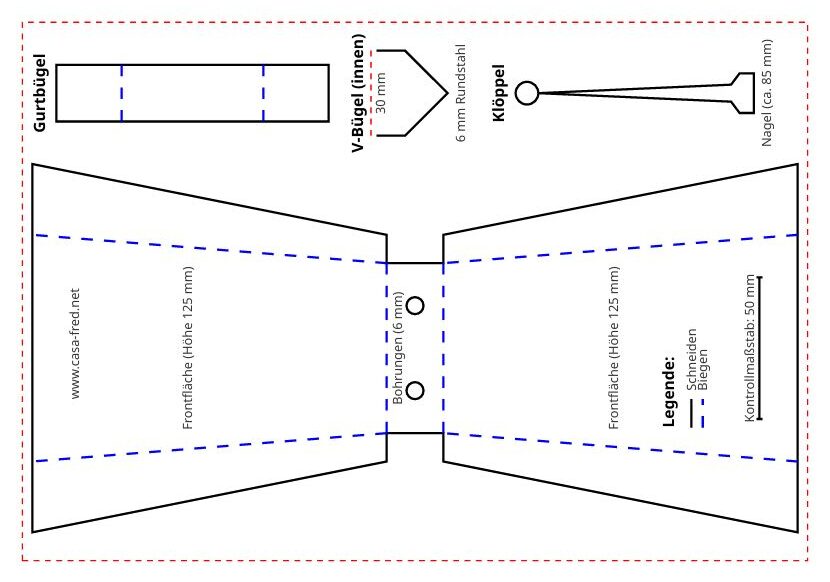 To download the PDF, simply click on the drawing
How it is done
- Cutting out: Print the drawing, spray the back with spray adhesive and stick it onto the sheet. Cut the marked shape out of the sheet and deburr the edges.
- Scoring: To get a straight, sharp edge I use a scriber and a piece of flat bar. I score the fold line on the front and back of the sheet; it then bends more easily and more precisely. If the vice jaws are too short, two thick pieces of flat bar or two pieces of angle iron help. I clamp the parts to be folded, which gives me more leverage when bending and lets me sharpen the edge with the hammer.
- Bending: Clamp the sheet in the vice at the spine. Carefully bend both wings downwards until they are almost parallel. Jaw protectors on the vice help enormously here.
- Welding: Press the side edges together and set a few tack welds. When everything sits properly, weld the seam through and then grind it clean with a flap disc. If you have CuSi3, it makes a beautiful seam.
- Finish and sound: Weld the bent flat bar on top as a handle and hang the clapper inside. Finally, heat the finished bell thoroughly once more (until it glows cherry red). This relieves the stress in the material and gives a full, loud sound (I do this in the charcoal grill).
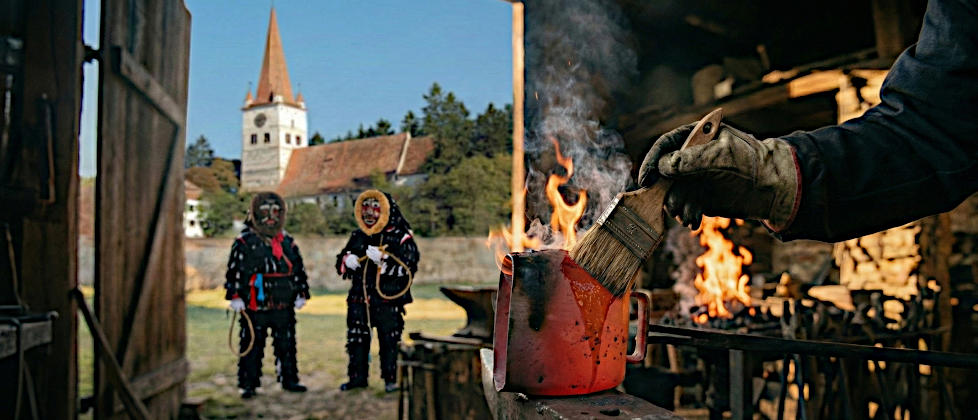
- Rust protection (oil blackening): Let the glowing bell cool briefly until it no longer glows red but is still very hot (approx. 300 degrees Celsius). Now quickly coat it with linseed oil. The oil smokes, burns onto the surface and soaks deep into the pores. This gives the bell a great matt black patina and protects it perfectly against rust.
The finished Urzel bell is fastened in the classic way: either directly on the belt or tied around the hips with a sturdy cord.
If you love the Urzelnlaufen and really want a home-made bell but lack the tools, just get in touch with me. If I happen to be on site in Cincu and we find a time that suits us both, I will gladly help you with advice and hands-on support. Then we will simply hammer and weld the piece together at my place.
Good luck, and perhaps see you soon in the workshop!
When you have finished your bell, I would be delighted if you sent me a picture.
The bell is only one of several components of the Urzel costume. It also includes the suit, the mask, a braided whip and a kind of wooden clamp into which the doughnuts are pinched. If you need those as well, get in touch with Uwe Boghian.