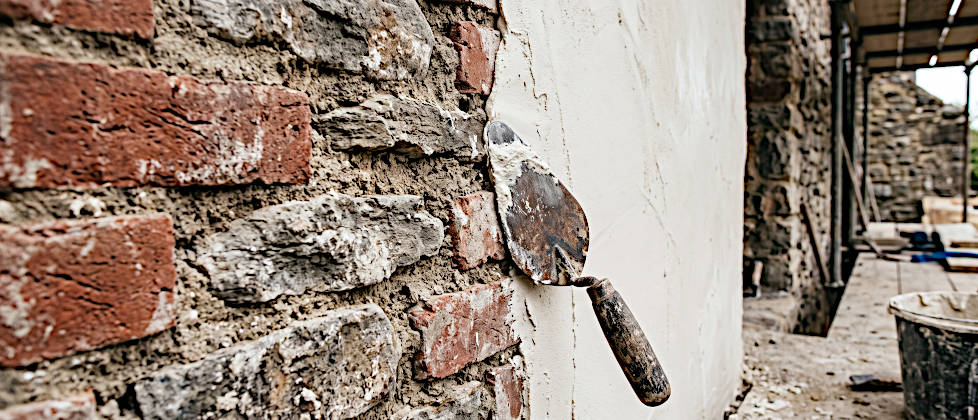
When I bought my old farmhouse from 1888 in Romania in 2016, I knew there would be a lot of work ahead of me. But only when I started knocking the layers of plaster off the walls did the true structural challenge of this project reveal itself. Beneath the crumbling plaster emerged a fascinating, yet building-physics-wise highly demanding structure: a solid mixed masonry consisting of hard, cool Saxon rubble stones and relatively soft, extremely absorbent field-fired bricks.
If you are standing in front of a similar wall, you will notice that this masonry has its own rules. The stones expand completely differently with temperature fluctuations. They absorb moisture at entirely different rates and release it just as differently. Modern standard solutions from the hardware store, designed for quick application and maximum hardness, fail miserably here. You need profound knowledge, a lot of patience, and the right material. In this post, I write about my experiences with how applying lime plaster to mixed masonry works and give you my guide on how I plastered the walls of my old farmhouse with rubble stone walls.
The primary goal when restoring such buildings is to plaster the walls – whether uneven, weather-beaten, or moisture-laden – in such a way that the diffusion capability of the historical masonry is fully preserved. With this method, you work exclusively with pure lime and sand. This is how the builders of these houses did it well over a hundred years ago, and this technique has proven itself over centuries. Modern binders like cement or plastic-modified ready-mixed plasters are the absolute enemy of the historical wall substance.
Building Physics: Why Modern Building Materials Destroy Historical Walls
To understand why you have to work with lime, let’s take a short excursion into building physics. A historical mixed masonry is constantly “working”. A wall made of soft field-fired bricks and rubble stones is not a static, dead structure, but a system that absorbs moisture from the room air, driving rain from the outside, or capillary rising damp from the foundation, and releases it again. This process is vital for preserving the stones.
If you choose a flawed wall structure here, you interfere with this moisture balance and risk massive structural damage, which often only becomes visible after a few years but then takes on catastrophic proportions. The most important building physics principle that you must never forget during the entire restoration is:
Let’s look at this principle more closely. Due to its high density and strength, cement plaster forms a rigid, almost impermeable shell around the soft masonry. Moisture that penetrates the masonry from the inside through microscopic hairline cracks, rising damp, or diffusion processes can no longer vent through this cement layer. It literally backs up behind the cement shell.
In summer, this leads to a musty indoor climate and mold growth inside. In winter, it becomes even more dangerous: if the temperature drops below freezing, the trapped water crystallizes directly behind the cement plaster. Since water expands when it freezes, enormous pressure is created. In the worst case, this pressure blows the soft field-fired bricks to pieces. The cement plaster falls off in large areas, often with a layer of brick still attached to the chunk of plaster, and the historical wall substance is destroyed.
Materials Science: Choosing the Right Lime
To successfully and sustainably manage applying lime plaster to mixed masonry, you have to understand the different types of lime and their chemical properties. In the building materials trade, you will find countless bags labeled “lime plaster,” but most of them are lime-cement mixtures. However, for a 19th-century farmhouse, only pure limes may be used.
1. Aerial Lime (Hydrated Lime CL 90)
Aerial lime is the purest form of building lime. As the name suggests, it cures exclusively by absorbing carbon dioxide (CO2) from the air. This chemical process is called carbonation. Aerial lime is extremely soft, low-tension, and has the highest vapor permeability of all binders. It is highly alkaline and thus naturally prevents mold growth. It is perfectly suited for dry interior rooms. Its disadvantage: it sets very slowly and must not be permanently moist during the drying phase, otherwise the carbonation process stops.
2. Natural Hydraulic Lime (NHL)
For heavily stressed exterior walls, damp basements, or plinth areas, you fall back on natural hydraulic lime. This lime is burned from special limestones that naturally contain a proportion of clay minerals and silica. These mineral additives ensure that the NHL lime sets not only through the CO2 in the air but also through the reaction with water. So it also hardens in a moist environment.
Hydraulic limes are divided into strength classes (NHL 2, NHL 3.5, and NHL 5). For soft historical masonry like my field-fired bricks, I use exclusively NHL 2. This lime is still soft and flexible enough to absorb the tensions of the mixed masonry but offers sufficient resistance against driving rain on the facade. Higher strength classes (like NHL 5) are often too hard for old field-fired bricks and can lead to tearing.
My tip: Pay strict attention to the declaration when buying. Do not use HL (artificial hydraulic lime) or formulations like “lime mortar with hydraulic additives,” as cement is often mixed in as a hardening accelerator here. Ideally, purchase the material through a specialized natural building materials trade.
The Sand: The Foundation of Your Plaster
The lime is merely the glue that binds the individual grains of sand together. The actual body of the plaster, which gives it volume, structure, and compressive strength, is the sand. This is where the most serious mistakes are made. The wrong sand ruins even the best lime.
Never use unwashed sand from the pit next door. Unwashed sand contains organic components, earth, and especially clay. These fine components wrap around the sand grains and prevent the lime crystals from optimally bonding with the sand when setting. The result is a plaster that achieves no strength, is highly sandy, and forms cracks quickly.
You absolutely need washed sand. Slightly sharp-edged sand (crushed sand or pit sand) is ideal, as the lime crystals can mechanically interlock much better in the edges than on completely rounded river sand. For the base coat, which has to level out large unevenness, I choose a coarse grain size of 0–4 mm. This gives the plaster a strong, stable skeleton. For the fine, final finishing coat, I use a grain size of 0–1 mm or a maximum of 0–2 mm.
Tool Guide and Occupational Safety
Before you get started, let’s take a quick look at tools and safety. Lime is highly alkaline (high pH value) and, when wet, has a corrosive effect on the skin and mucous membranes. Be sure to wear tightly fitting safety goggles when mixing and throwing on the mortar. A splash of lime in the eye is a serious medical emergency! Also, work with suitable protective gloves.
For tools you will need:
- A forced-action mixer or free-fall mixer for mortar production (pure lime plasters have to be mixed for a very long time, often 10 to 15 minutes, until the mortar becomes “creamy”).
- Masonry trowels in various sizes for throwing on the plaster.
- A smoothing trowel for application.
- An aluminum straightedge or screed board for leveling the base coat.
- A grid rabot (plaster comb) for roughening the base coat.
- Wooden floats and sponge floats for rubbing the finishing coat.
- A masonry brush (large brush) and a water hose with a fine spray nozzle for the essential pre-wetting.
Preparation: The Foundation for Durable Plaster
Plastering the rubble stone wall of the farmhouse stands or falls with the surface preparation. If the substrate is not sound, the best plaster is useless. This work is absolutely essential.
Historical masonry that was incorrectly plastered for a long time or left exposed is often covered with loose old sand, dust, soot, or crumbly joint remnants. First, the old, damaged plaster must be completely knocked off. Do not trust any spots that “still sound pretty good.” I removed the plaster completely in my case.
Then I turned my attention to the joints. I scraped out the joints between the field-fired bricks and the rubble stones about one to two centimeters deep. This massively increases the overall surface area of the wall and later offers the new lime plaster an excellent opportunity for mechanical interlocking. After that, I thoroughly brushed the entire wall with a stiff street broom or a sturdy wire brush until no more loose sand trickled down.
The Physical Problem of Absorbency
Now comes the step that decides between success and failure: water management. We are dealing with mixed masonry. Rubble stones are often extremely hard and absorb almost no water. Field-fired bricks, on the other hand, are as porous as a bath sponge. If you now throw a wet, smooth lime mortar onto a dry brick wall, the following happens: the dry brick sucks all the mixing water out of the mortar. This process is called “burning out”. The lime now has no water left to bind chemically (especially with NHL). It literally dies of thirst on the wall. The result is a sandy layer that you can simply wipe off again by hand the next day. This is known as: the plaster is burned.
Therefore, you must intensively saturate the wall with water. I wash the wall down completely with a water jet the day before plastering. This removes the last fine dust and saturates the thirsty bricks. On the day of plastering itself, I take the brush or the garden sprayer and specifically wet the wall again. The goal is for the stones to be matte-damp and dark. They must no longer absorb water strongly, but there must absolutely be no continuous film of water on the surface, otherwise the plaster will slide off.
Step-by-Step Guide: Applying Lime Plaster to Mixed Masonry
I work with the classic historical plaster structure. The basic craftsmanship rule for this is always: from hard to soft and from coarse to fine. This means that the layer closest to the masonry is always the coarsest and slightly strongest layer. Towards the outside, the plaster becomes finer and softer. This is necessary to gradually reduce the tensile stresses that occur during drying and to prevent cracking.
For the exact execution, I follow this guide:
Step 1: The Spatter Dash (The Bonding Bridge)
Since I have different stones with completely different absorption behaviors, I need an adhesion promoter: the spatter dash. This balances the absorption behavior and creates a homogeneous, rough surface onto which the heavy base coat can later hold on.
The spatter dash is an extremely runny mortar, almost like a thick soup. For this, I mix the NHL 2 lime with the coarse sand (0–4 mm) in a ratio of 1 part lime to 2 to 2.5 parts sand. I add enough water to create a liquid slurry.
This spatter dash is thrown onto the wall in a net-like pattern with the plastering trowel. It requires a bit of practice in the wrist: the mortar is not applied over the entire surface and under no circumstances spread with the trowel! You throw it on with momentum so that about 50 to 70 percent of the wall is covered with rough, wart-like plaster splatters. It is precisely these rough warts that later form the mechanical grip for the base coat. I then let the spatter dash dry and cure for one to three days, depending on the weather.
Step 2: Applying the Base Coat (Leveling Layer)
After the spatter dash has cured (and has been slightly pre-wetted again before the next step!), the actual body of the wall structure follows. The task of the base coat is to level out the sometimes massive unevenness of the rubble stones and to create a (plumb) surface.
The mixing ratio for the base coat is typically 1 part by volume of NHL 2 to 3 parts by volume of sand (0–4 mm). This mortar is adjusted to be plastic, but not too wet. The base coat is applied in an average layer thickness of 15 mm.
With heavily fissured rubble stone walls, where deep holes often gape between the stones, you must not try to do everything in a single step. Layers of lime plaster thicker than 20 mm shrink enormously when drying, form deep cracks, or simply slide off the wall due to their own weight. Such deep holes must be thrown in with a coarse mortar days in advance and left to dry in order to roughly level the wall.
I traditionally throw it on with the masonry trowel. Then I level the wet plaster with a straightedge to obtain a flat surface. Visual perfection is not required; what is important is a uniform bed for the final layer.
Step 3: Roughening with the Grid Rabot
This step is almost always forgotten but is important for building physics. Once you have leveled the base coat, it slowly begins to set (to dry and bind). I wait until the plaster is “thumb-hard.” This means: if you press firmly on the plaster with your thumb, it gives slightly, but no wet mortar sticks to your finger anymore.
Now I take the grid rabot (a handle with a coarse metal grid on the underside) and diagonally roughen the entire surface of the base coat. In doing so, I scratch off about one to two millimeters of the top layer again.
Why do you do this? As the plaster dries, the water transports the finest lime binders to the surface. They dry there and form the so-called sinter skin – a smooth, dense, and hard layer. If you apply the finishing coat directly onto this sinter skin, it will not bond and will flake off sooner or later. By roughening it with the rabot, you destroy the sinter skin, expose the coarse grain of sand again, and increase the surface area. This offers the fine finishing coat the best possible hold.
Step 4: The Critical Curing Time and Drying
Now patience is required. Lime needs time for carbonation and hydraulic setting. If you apply the finishing coat too early onto the still wet, un-shrunk base coat, it will inevitably crack.
Be sure to adhere to the plasterer’s most important rule of thumb: For every millimeter of plaster thickness, allow one day of curing time (drying time).
So, if you have applied the base coat 15 mm thick, you must give the wall 15 days of rest before the finishing coat follows. During this curing time, however, you must not leave the wall to itself. Lime needs a certain basic moisture to set. In dry weather, strong wind, or direct sunlight, you must regularly re-wet the plaster with a very fine spray mist during the first few days. It must not dry out too quickly, otherwise it will not reach its full strength. You can also hang wet jute cloths in front of the wall and keep them damp.
Step 5: The Fine Finishing Coat and the Finish
After the extensive curing time comes the finish: the finishing coat. The rough surface of the base coat is pre-wetted again with the brush to bind the last dust and prevent burning out again.
For the finishing coat, I use the fine sand (0–1 mm) and mix it in a ratio of 1 part lime to 3 or 4 parts sand. This mortar is adjusted to be somewhat smoother. It is applied with the smoothing trowel in a very thin layer of only about 3 to 5 mm. I work “wet-on-wet” here in terms of the systemic plaster structure: the substrate must be pre-wetted so that the layers can bond moistly.
As soon as this fine finishing coat becomes matte on the surface and starts to set (do the thumb test again!), I begin to rub it. For this, I use a traditional wooden float or a modern sponge float. Through uniform, circular movements, the fine plaster layer is compacted, the grain of sand is pressed into the lime bed, small pores are closed, and it creates exactly the beautiful, slightly cloudy and lively texture that makes hand-plastered historical buildings so distinctive and appealing. I only apply light, but steady pressure while doing this.
Analyzing Typical Damage Patterns and Sources of Error
Working with pure lime forgives no negligence. Even if you stick closely to the theory, mistakes can happen in practice. Let’s go through the most common problems so you know how to react:
- Net-like shrinkage cracks: Fine cracks that look like a spider web usually occur if the sand was too fine (too little coarse supporting aggregate), the plaster layer was applied too thickly in one step, or there was simply too much mixing water in the mortar. If these cracks are only superficial in the final plaster, they often do not pose a building physics problem. You can try to rub them shut during the rubbing process with the sponge float and a little lime slurry.
- The plaster chalks massively: If you stroke the flat of your hand over the wall after complete drying and your hand is completely white afterwards, the plaster is burned. The wall was not sufficiently pre-wetted beforehand, or the fresh plaster was exposed to strong drafts that took away the moisture. Slight chalking on the surface is normal with pure aerial lime, but deep-seated sanding means a massive loss of strength.
- Hollow plaster or large-scale flaking: If you knock on the dried plaster and it sounds hollow, the layer has detached from the substrate. This is usually due to the lack of a bonding bridge (the spatter dash), the joints not being scraped out deeply enough beforehand, or the substrate still being extremely dusty during application. Unfortunately, such areas must be knocked off over a large area and completely rebuilt.
The Microclimate: Ambient Temperature and Weather Protection
Lime is a pure natural material that is highly sensitive to its surrounding microclimate during chemical setting. Applying lime plaster to mixed masonry should only be done at temperatures between 5 °C and 25 °C.
At temperatures below 5 °C, the chemical process of carbonation slows down extremely and comes to a complete standstill near the freezing point. Should there be frost at night while the plaster is still wet, the water in the pore structure expands and destroys the fresh plaster from the inside out – it freezes and becomes crumbly.
In midsummer at over 25 °C in the shade, the opposite problem exists: the water evaporates much too quickly. If you are forced to plaster in midsummer, work exclusively in the early morning hours on the shaded sides of the house. It has proven effective in old building renovation to subsequently hang the freshly plastered facade with wet jute cloths or special plasterer’s nets to keep out direct sunlight and wind. This creates a moist, cool microclimate in which the lime can set in peace.
Valuable Resources and Contact Points for Your Project
If you want to dive even deeper into the professional renovation of old building structures, you can draw on the knowledge of networks that have dedicated themselves to the preservation of historical buildings for decades. I can highly recommend the following points of contact from my experience:
- WTA (Scientific-Technical Working Group for Building Preservation and Monument Conservation): This institution publishes scientifically sound leaflets. Professional restorers, stucco plasterers, and preservationists orient themselves to these guidelines. The WTA guidelines, especially regarding renovation plaster systems and half-timbered houses, are the industry standard in German-speaking countries.
- IG Bauernhaus (Interest Group for Farmhouses e.V.): An absolutely fantastic, nationwide network for builders who preserve old farms, cottages, and half-timbered houses from decay. Here you will find like-minded people, regional meetings, and enormous practical knowledge grown over years.
- Fachwerk.de: One of the largest, most active, and most competent German-language platforms for old building renovation. Especially for detailed questions on topics such as rubble stone, rising damp, and pure lime plaster, you will find countless field reports and assistance from professionals and ambitious amateurs here.
The renovation of a solid, historical wall made of irregular rubble stone and soft field-fired bricks requires more muscle power, theoretical prior knowledge, and craftsmanship sensitivity than the quick application of modern gypsum or cement plasters from the hardware store. It is a process of deceleration.
But I assure you: the effort you invest here pays off many times over. Not only do you preserve a piece of building history, but in the end you get a wall that breathes. A wall that naturally regulates the indoor climate, gives mold no chance, and – if carried out professionally with pure lime – will easily survive the next hundred years.